Accepting Payments
The booking system supports a payment function that you can use to let your clients pay when they book an appointment. Please contact booking@calengoo.com if you would like to use that function so that it can be activated for your account.
In addition to using PayPal for payments it is also possible to use Stripe. Stripe allows payments using credit cards and other options depending on your country. To use it you need a Stripe account. You can get it for free on https://www.stripe.com.
Your clients will pay directly to your Stripe account. Stripe provides a website for this, which is used by the booking system. This means that the booking system simply redirects your clients to your Stripe website. You have full control over the payments in your Stripe account, because your clients are paying directly into your own Stripe account. To check your payments you can use the Stripe app or the Stripe website. Additionally, Stripe informs the booking system (if you correctly add the Webhook as explained below) about payments and their status so that the booking system can also show you if it has received a confirmation for a payment from Stripe for a booking. It will show this in the “Bookings” screen.
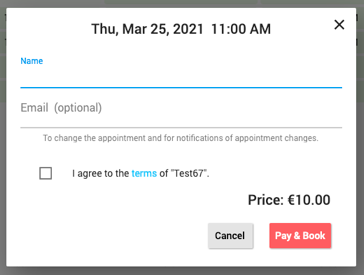
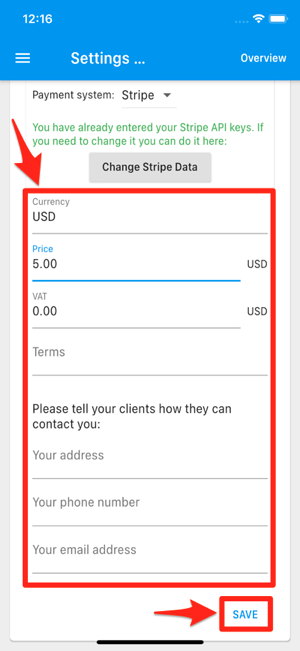
Your clients will see the price like this when they make a booking:
Booking System Stripe Setup
You need a Stripe Public Key and a Stripe Restricted Key for the Booking System app:
-
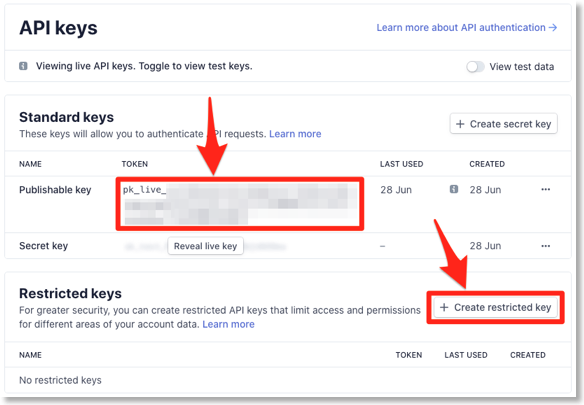
Sign in to the API Keys page.
-
In the “Standard keys” section you can find the “Publishable key”. You can click on it to copy it into your clipboard. Then paste it into the “Public Key” field in the booking system (see below where to find it). Additionally you need a restricted key. Click on “Create restricted key” and then “Building your own integration”:
-
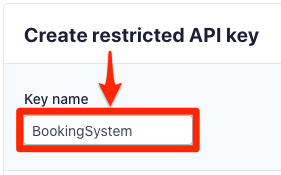
Enter a name for the key, e.g. “BookingSystem”:
-
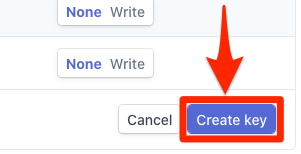
Click on “Write” behind “Checkout Session” to allow the booking system (only) to create checkout sessions, where people can pay for booking your appointments:

-
Click on “Create key”:
-
Click on the key and copy it into the “Restricted Key” field in the booking system app.
-
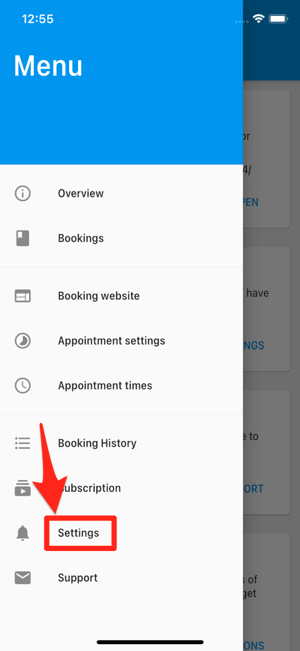
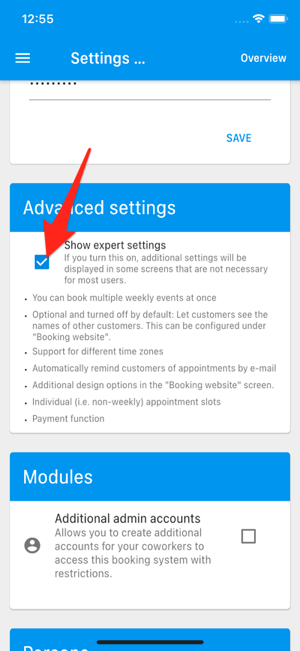
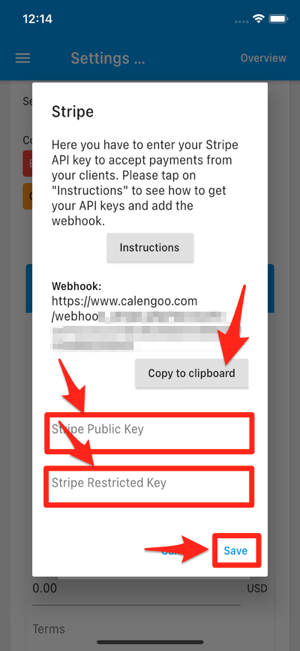
To find the fields for the “Public Key” and the “Restricted Key” in the Booking System app please tap the menu button in the upper left corner of the Booking System app and select “Settings”. Turn “Show expert settings on”.
-
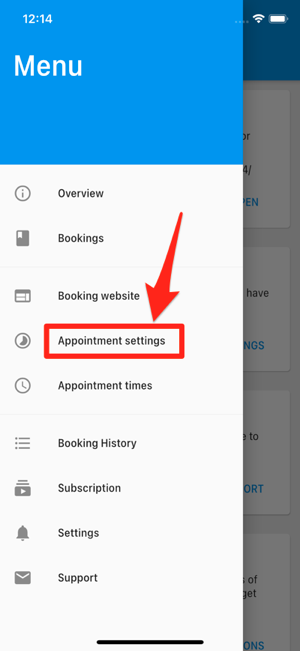
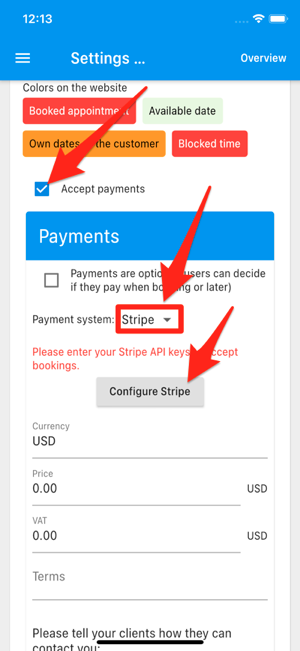
Then tap the menu button again and select “Appointment settings”. Turn “Accept payments” on, select “Stripe” and click on “Configure Stripe”. There you can enter the “Public Key” and the “Restricted Key” and get the Webhook URL.
If this is too cumbersome on your phone, you can also set it up on your computer: In the app, open the menu via the button in the upper left corner, select “Settings” and enter your e-mail address with a password of your choice under “Account”. Then you can log in on your computer at https://www.calengoo.com/booking_admin/ with this e-mail address and password and enter the Stripe data there.
-
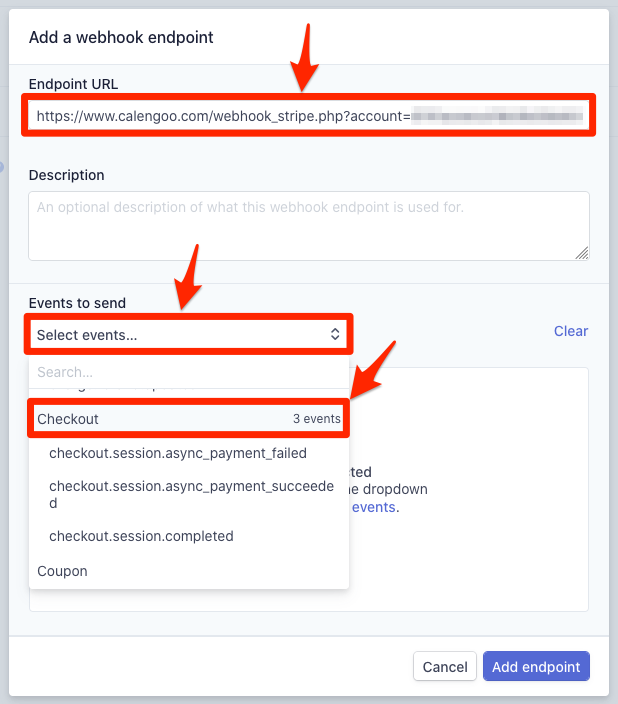
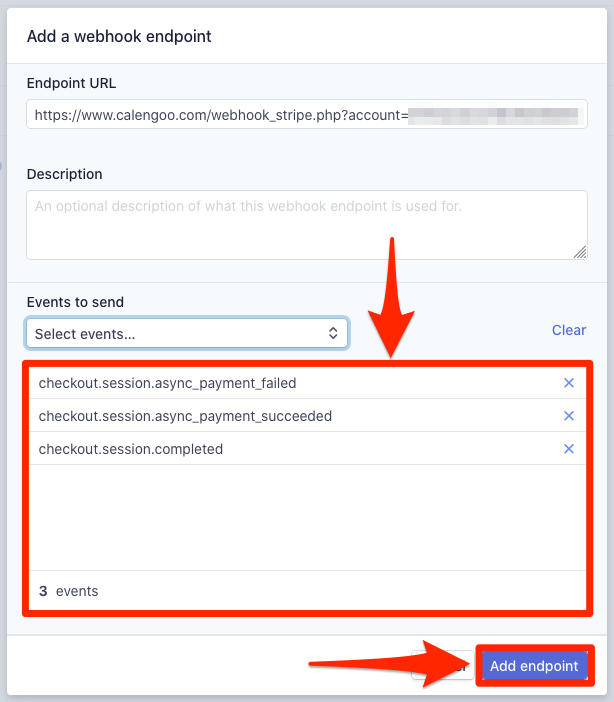
Click on “Webhook” on the left side of the Stripe website and then on “Add endpoint”. Set the " Endpoint URL" to the URL that is displayed in the booking system (you can copy it by tapping " Copy to clipboard" and then paste it into the Stripe website). Then click on “Select events…” and select “Checkout 3 events”. Afterward click on “Add endpoint”.
(You can optionally also select “charge.refunded” (in addition to “Checkout 3 events”) if you sometimes manually refund payments and would also like to see in the booking system that a payment was refunded).

This is important to let the booking system know if a booking was successful. Don’t tell the webhook link anyone, it must be kept secret.
Stripe charges a fee for each transaction, which is usually about 2,90% plus a fixed fee. You can find an overview here: https://stripe.com/pricing
If you have any problems or questions just contact the support.